Oct 20, 2023
According to the National Fire Protection Association, there are nearly 16,000 dryer fires every year in the United States. Most of the time, these fires start due to an uncleaned dryer vent. As a dryer is used on a weekly basis, lint gathers in the vent hose and backs up over time. If it backs up too closely to the heating elements, that’s a house fire waiting to happen.
It’s best to keep your dryer vent clean and lint-free, but professional dryer vent cleaning can be expensive. Luckily, there’s a solution for the DIY-minded homeowner: dryer vent cleaning kits.
But how do you use a dryer vent cleaning kit?
And, beyond just lint, how do these kits help you clean out bigger blockages?
At HY-C, we manufacture LintEater, a home dryer vent cleaning kit designed to help you clean your own dryer vent and keep your home safe from accidental house fires. We understand that these cleaning kits are complex, so we want to show you how to use one.
In this guide, we’ll cover how to use a dryer vent cleaning kit step by step (we’ll use our own LintEater Pro as an example, but most of these kits operate very similarly to each other). We’ll also explain how to use the kit to clear larger obstructions (like birds nests) from your dryer vent, and we’ll include step-by-step pictures to make things as clear as possible.
Step 1: Take an Inventory
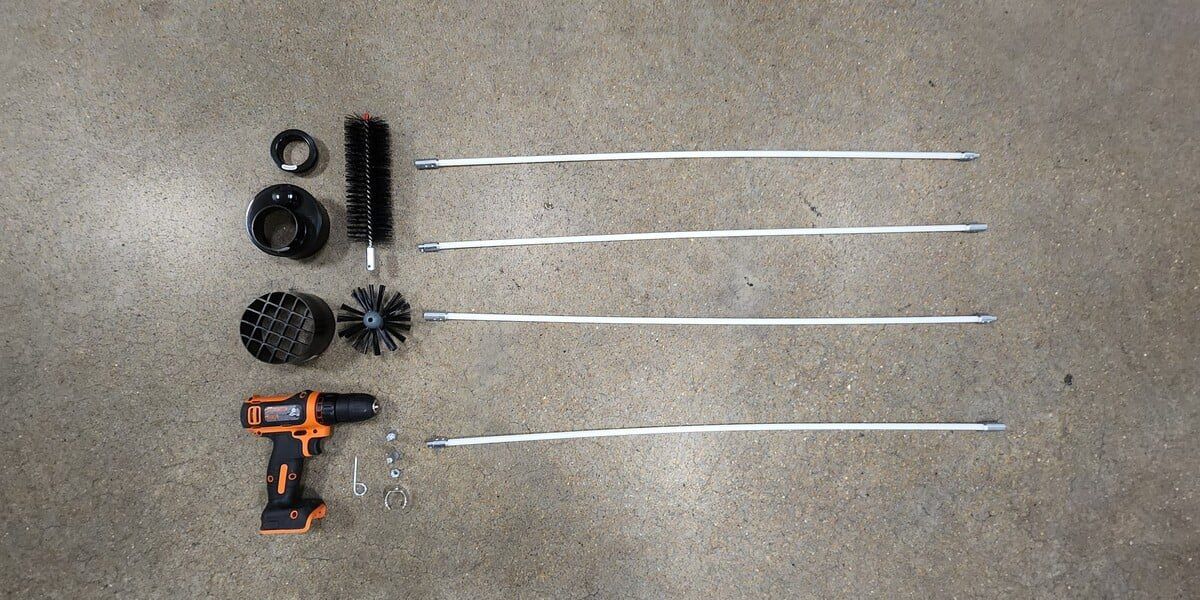
Before cleaning lint, blockages, or anything else from your dryer vent hose, the best thing to do is to take stock of your dryer vent cleaning kit to make sure all the components are present. Our LintEater Pro kit, for example, includes the following components:
- Four 36” rods
- One 2.5” lint brush
- One 4” auger brush
- One vacuum adapter
- One dryer/blower adapter (with size adjustment ring)
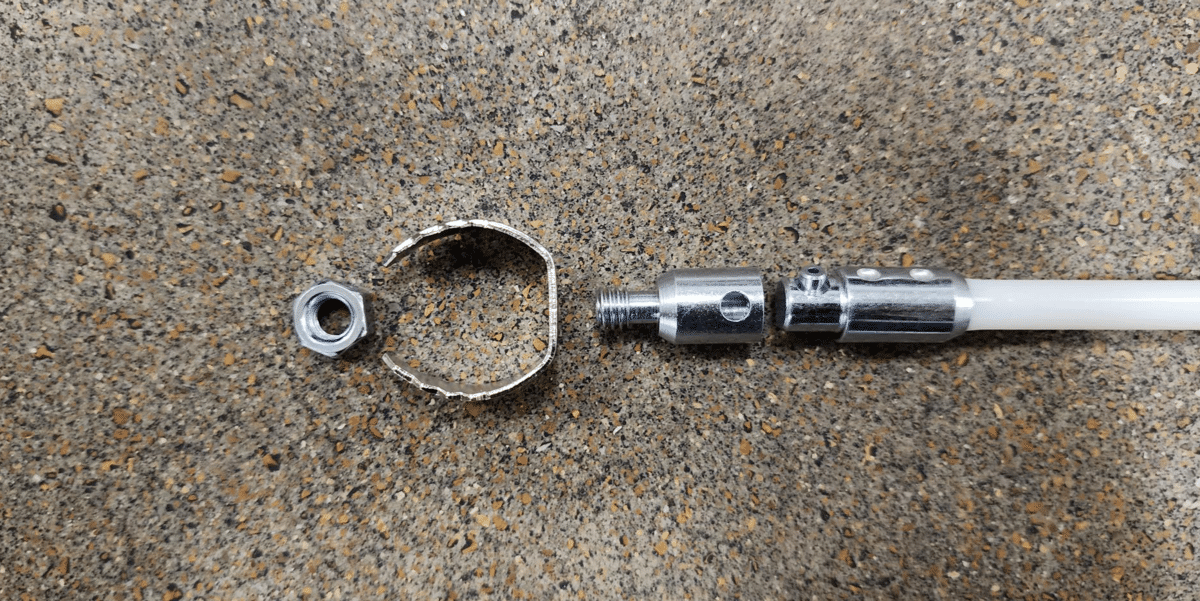
- One blockage removal tool (with nut)
- One drill adapter bit
- One button release pin tool
In order to capitalize on the kit’s rotary cleaning capabilities, you’ll also need a cordless drill. Be sure the drill’s chuck is big enough to accommodate the drill adapter bit (a drill with a ⅜” or ½” chuck will work well).
It’s optional, but if you have a Shop-Vac (or a similar vacuum), it will help greatly during the lint removal process.
Step 2: Clean out any Large Blockages
This step doesn’t require your drill yet (but keep it handy). Start by locating your dryer exhaust vent on the side of your home. You’ll have to remove that vent and any other protective covers that may be present on your home (like animal exclusion guards).

After that’s off, attach the drill adapter to one of the rods, slide the blockage removal tool over the threaded portion of the drill bit adapter, and secure it in place with the nut.
From there, insert the rod into your dryer vent, continually rotating it clockwise as you slide it in. As you insert the full length of the rod all the way into the vent, connect another rod to continue pushing further into the vent.
If you feel any blockages (like a bird’s nest or a large chunk of lint), keep rotating the rod(s) to catch the blockage on the removal tool. Pull out any large obstructions you find until you reach the end of the vent hose.
After you’ve finished clearing these blockages out, you’re ready to tackle the dryer lint.
Step 3: Attach Your Vacuum
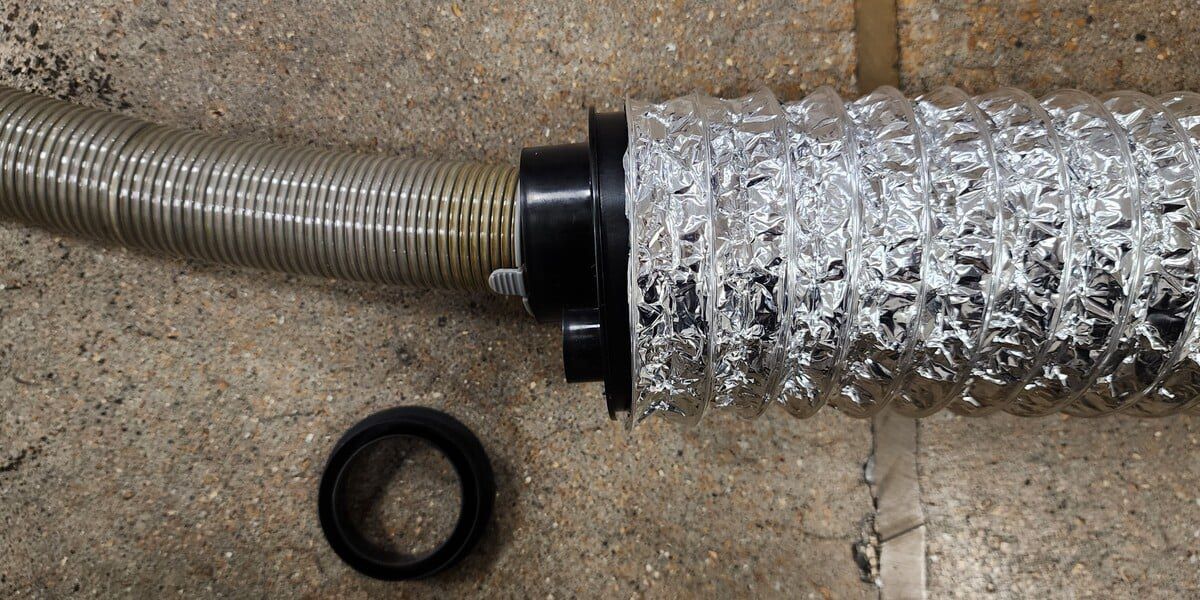
Pull your dryer out from the wall and disconnect the vent hose from the back. Next, insert the vacuum adapter into the vent hose and connect the vacuum hose into the vacuum adapter (if your vacuum hose doesn’t fit, try using the included adapter ring).

The rest of the cleaning process consists of pushing lint from the exhaust vent on the outside of your home toward the vacuum on the other end. If you don’t have a Shop-Vac-style vacuum, that’s okay — just understand that the lint will spill out of the hose and onto your floor, and you’ll have to pick it up after you’re finished.
Step 4: Assemble Your Cleaning Kit
Head back outside with the rest of your kit’s components. Insert the drill adapter bit back into your drill and attach a 36” rod. Depending on the kit you purchased, your rods may have button-style connectors, or they may be threaded and screwed into each other.

On the other end of this rod, attach the auger brush. Also, be sure to insert a fully-charged battery into your cordless drill.

Step 5: Clean Your Dryer Vent
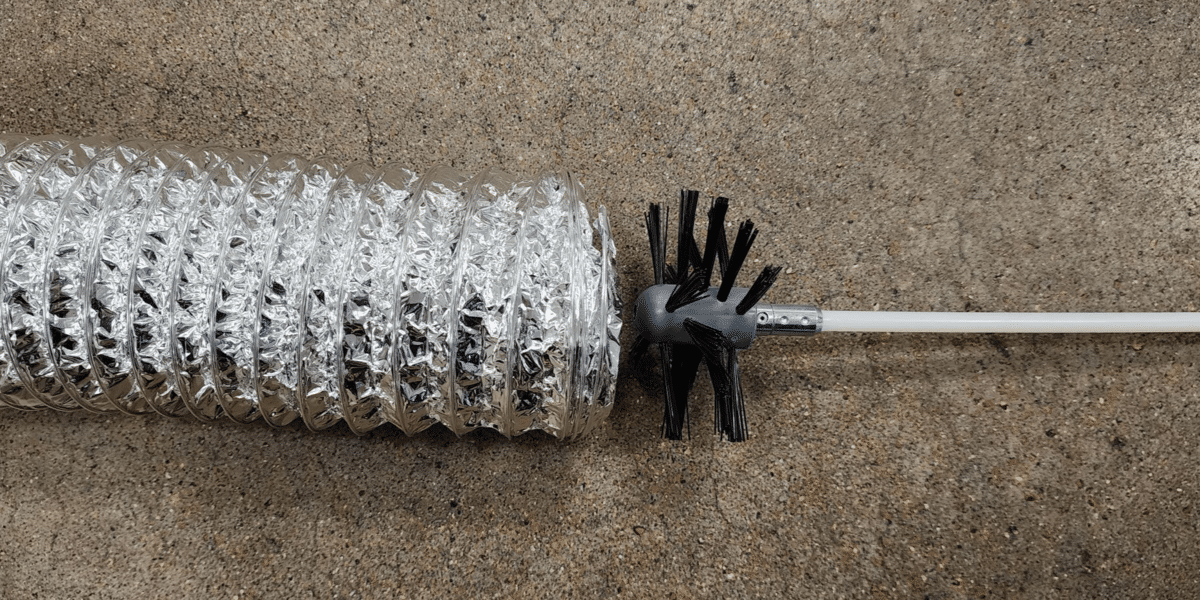
With the rod, auger brush, and drill connected, it’s time to clean the lint out of your dryer vent hose. Insert the auger brush head into the dryer vent and power on your drill. Be sure to utilize a medium to high power setting.
Push the auger head back and forth, moving your way deeper into the vent hose to dislodge dryer lint as you go. After you’ve pushed the first rod all the way into the hose, disconnect that rod from the drill and attach another one. Attach those two rods to each other, and hook everything back up to the drill. Additional rods will allow you to push even deeper into the vent hose.

Repeat this process as many times as you need to until you reach the end of your vent hose or you run out of cleaning rods. (If the rods in your kit aren’t long enough to clean the entire vent hose, simply finish the job from the other end.)

Step 6: Reconnect Your Vent Hose to Your Dryer
After you’ve cleaned out all the excess lint in the dryer hose, be sure to reconnect the hose to the back of the dryer. Also, reattach any dryer vent covers you may have removed from the outside of your home.

How Often Should You Clean Your Dryer Vent?
Dryer vent cleaning kits come with all kinds of parts and pieces that work together to help you keep your dryer vents lint-free. By now, you should have a sense of how those pieces work together, and how to use them to eliminate lint from your dryer vent effectively.
But cleaning just once isn’t enough. It’s best practice to clean your dryer vent three or four times a year, especially if you do laundry often for several members of your household. Keeping a clean vent not only helps to prevent house fires, but it also allows your dryer to run more efficiently.
If you don’t have a kit yet, it may be helpful to compare some of the most popular dryer vent cleaning kits on the market. This will help you to get a sense of which kit is the best fit for your dryer setup and will go a long way to reducing fire hazards in your home.
